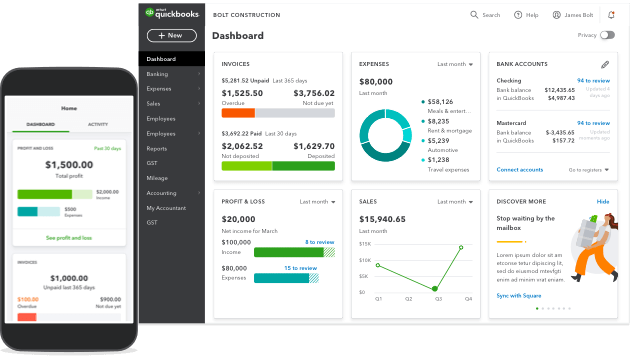
Quickbooks Online Error 9999 is a type of error that is encountered when a user tries changing and updating the banking and account details of the business on the company file of QuickBooks. This is the basic information regarding Error 9999 QuickBooks but further, in the article, you will get to know everything about this online error. You must be wondering every time the word ‘QuickBooks’ pop up. Let us help you with this and tell you what QuickBooks software is.
QuickBooks came in 2012 with the idea of making the work of financial management easy and efficient. Intuit and its developers were successful in making it one of the best financial accounting management software applications in the world. From start-ups to small-scale to medium-scale industries, it is widening its grip in the market. It assists the firms in tracking important managerial tasks, prepare financial reports and tax receipts, organizing employees’ data, and management of other inventories.
With all the modern features at their peak upgrades, still there is no way it can overcome every shortcoming. Various glitches, bugs, glitches, technical issues, system troubles, errors – network errors, online errors, install errors, update errors, etc. exist while working with QBs software. These issues will definitely make you feel irritated and cause obstruction in your hassle-free work. But we are here for your rescue as in this article, we will discuss one such kind of online error – QuickBooks Online Error 9999. Read with us and learn easily.
What is QuickBooks Error Code 9999?
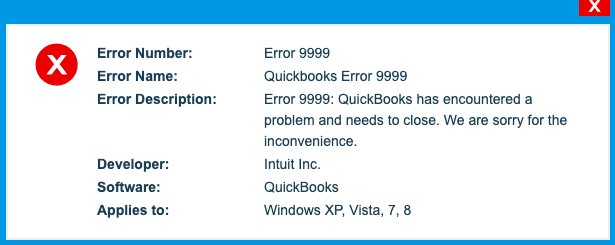
The Quickbooks Online Error 9999 is an error that prevails in your system because of the interruption between QuickBooks and the bank’s server. In case a user keeps changing or updating or refreshing the bank and account details of the firm on the QBs company file, this online error can be encountered. Once this error is existent in your system, then this type of message can be seen in your window: Apologies, we can’t refresh your record. Whenever this happens, you will be blocked from updating the bank details, accessing bank transactions, etc.
With such issues, you must be in a haste to know the resolutions to all these kinds of errors but you must first know the causes as to why such error exists. Read below to get a list of causes behind Error Code 9999 QuickBooks online.
Why Quickbooks Online Error 9999 Happens?
- Failure in connection of the bank server with the Intuit server.
- Poor and unstable network and internet connection setup.
- Firewall settings block the proper working of QuickBooks and hence leading to these errors.
- Malicious attack by Virus corrupts and infects the Widows system.
- In many cases, the antivirus can be the cause of such errors.
- The emergence of cookies in your browser.
- Incorrect and unclean installation and download of the QuickBooks software.
- Windows registry files corrupted due to missing components.
- Missing QuickBooks-related folders or deleted QBs files and programs.
How To Detect QuickBooks Online Error 9999?
It is very important for any user to understand the type of error he is facing so as to take the correct actions on the specific error. We are guiding you below towards the signs that will assist you in identifying the Error 9999 QuickBooks.
- In case of this error prevailing in the system, the online QuickBooks user will be unable to connect with the server of the bank.
- The internet browser becomes slow and freezes from time to time.
- Frequent display of the QuickBooks Online Error 9999 on the computer screen.
- Operations in QuickBooks do not function properly.
- Crashing of the Windows consequently.
- Input devices become slow and sluggish in their functions.
How To Resolve and Fix QuickBooks Online Error 9999?
After detecting the error 9999, we need to resolve this online error as soon as possible. So, in the next few minutes, you will be reading the quickest and easiest solutions for troubleshooting this error. They are as follows.
Deleting The Unwanted Sites
- Firstly, go to your default browser Internet Explorer and tap on the option Favorite.
- You will now see a History tab. Click on it.
- Now, you will have to choose the option Filter to analyze the history with unwanted sites.
- Choose all those unwanted sites one-by-one.
- After choosing all, right-click on it and go for the option Delete.
- Finally, access QuickBooks and check whether the error still exists or not.
Linking QuickBooks Online
- Firstly, you need to cancel the existing QuickBooks online account.
- Now, you need to click on Edit.
- Reach out for the Edit Account Info.
- After this, click on the option Disconnect this account on save.
- Choose Save and then Close.
- Now, you will have to go back to the QuickBooks dashboard and have to renew the link.
- Return to the QBO account to link it again.
- Lastly, the user will be able to check all his updated transactions in his online account of QuickBooks.
Clearing Search History And Cookies
- The first thing is to open Internet Explorer and choose the Favorites option under it.
- Now, find the History tab and click on it.
- Go to the menu and choose History.
- Select the websites that are needed to be deleted and right-click on them.
- Choose option Delete.
Reporting Issues To The Tech Team

- Reach out for the Report tab and click on it.
- Now, tap on Report the Issue.
- After this, you need to access the banking transaction page to fill in the details such as name, email address, etc.
- Click on the option Submit.
- In a few moments’ time, you will surely be contacted by the technical support team of QuickBooks.
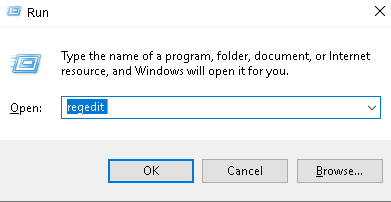
Repairing Registry File and Backup Key
- Firstly, in the search box type in Command.
- Now, hold the Ctrl+Shift key along with the Enter key on your keyboard.
- A dialog box will appear and you need to click on Yes.
- After this, write up Regedit in the blank space and tap on the Enter button.
- Choose a key associated with the Quickbooks online error 9999 code in QBs that you are looking to back up.
- From the File menu, choose the Option Export.
- Now, you need to save the QuickBooks key by selecting the Folder.
- Type in a name for the backup file and you need to make sure to select a branch.
- Save the file as a .reg extension file.
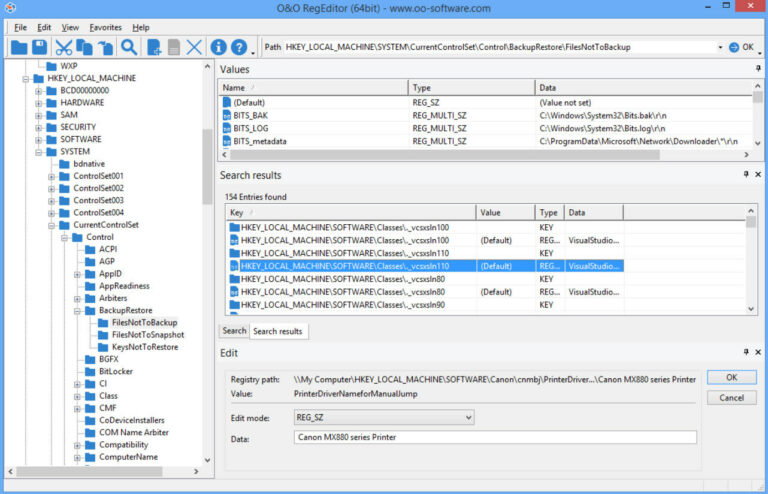
- Lastly, create a backup of registry entries associated with QBs.
Setting Up Firewall Configuration
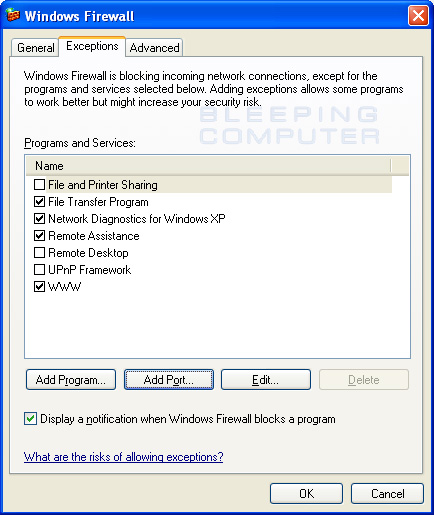
- Firstly, open your default browser and select the option Tools.
- Now, tap on Exceptions.
- Lastly, you will have to add these exceptions listed below.
- QuickBooks.com
- QBW32.exe
- Intuit.com
- Payroll.com
- Qbupdate.exe
Updating Your Bank
- Open the QuickBooks Online software.
- Reach out for the tab Banking.
- Choose option Update.
- Repeat this process about three times.
In case the error still exists in the system, you need to follow the next solution below.
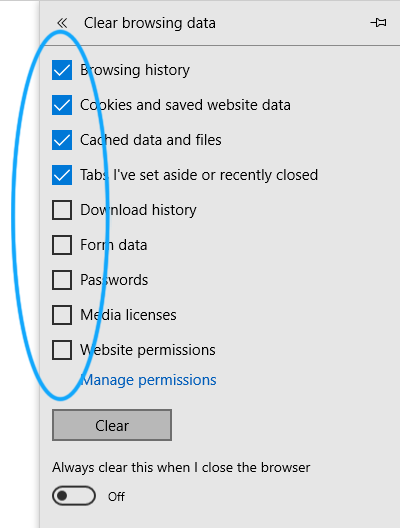
Cleaning Cache Files of the Browser
We have provided the process of removing cache files on different browsers to resolve QuickBooks Online Error 9999.
Safari
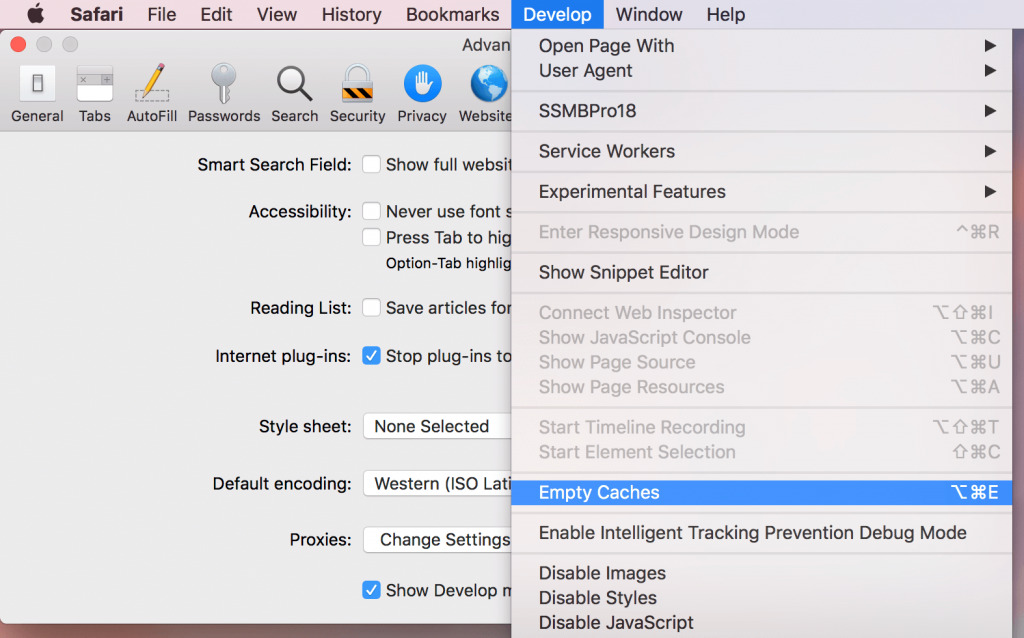
- On the top, you will see a tab Develop and you have to click on it.
- Now click on the tab Empty Caches.
Firefox
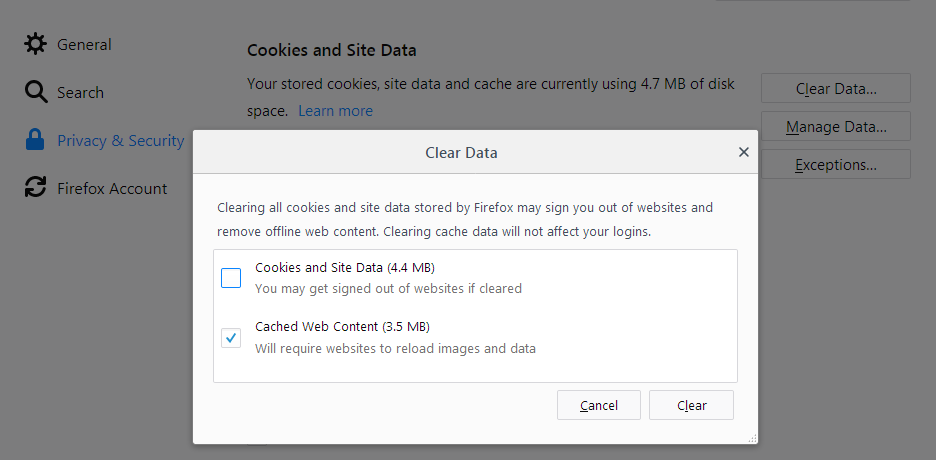
- Reach out for the address bar and type in about: preferences#privacy and tap Enter.
- Select option Clear Recent History.
- Check the cache box and tap on Clear Now.
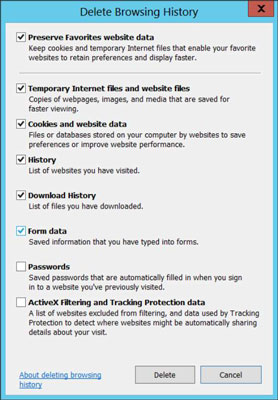
Internet Explorer
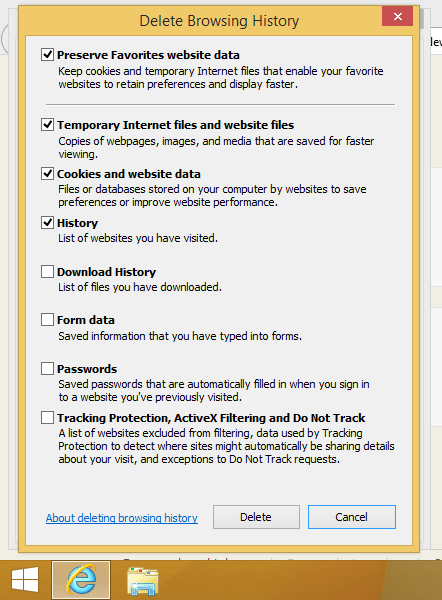
- Hold Ctrl + Shift + Delete on your keyboard.
- Now, checkmark the temporary internet and website files.
- Lastly, click on the option Delete.
Google Chrome
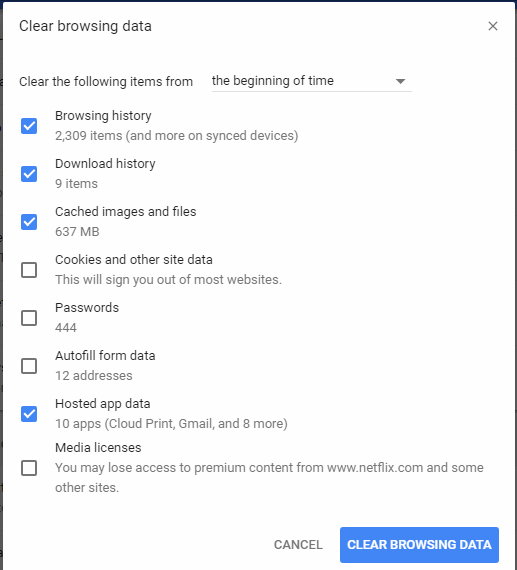
- Reach out for the address bar and type in chrome://settings/clearBrowserData, and Press Enter.
- Find the cached images file box and tick mark it.
- At last, tap on the Clear Data button.
ReConnecting Bank Account
In this procedure, you firstly need to disconnect your bank account and then reconnect your bank account again. The step-by-step process has been provided below.
To disconnect the bank account, follow these steps:

- Open Quickbooks online.
- On the left side, reach out for the tab Banking, select it by clicking on it.
- Go to the Edit icon.
- After this, in the Account Window, checkmark the option Disconnect this account on the save.
- Click on Save and tap on Close.
Now you need to reconnect the bank account, follow these steps:
- On the left side, go to the tab Banking, and click on option Add Account.
- Type in the details to log in to your bank and tap on Continue.
- For your own security, do follow the verification instructions.
- Reach out for the tab Securely Connect and go to the bank icon followed by your bank account.
- Under the option Account type, a drop-down menu will be displayed and you need to select your account from the given list.
- After this, select a credit card account or a bank account.
- In case you do not have your bank account then, click on +Add New and select the option Connect.
Using SFC and Updating Drivers
- Firstly, you need to update the System Device Drivers of your operating system.
- Now, make use of Windows Restore Utility to restore the recent changes made previously.
- After this, uninstall and perform a clean installation of the QuickBooks-related programs and applications.
- Perform a scan via Windows System File Checker(SFC/Scannow)
- Update and upgrade the Windows to the latest version available.
- Lastly, do a clean installation of Windows.
Conclusion
The Quickbooks Online Error 9999 is a type of error that prevails in your system because of the interruption between QuickBooks and the bank’s server. In case you keep changing or updating or refreshing the bank and account details of the firm on the QBs company file, this online error can be seen. In this article, we have given our best efforts to gather all the valuable information in a nutshell on QuickBooks Online Error 9999, its causes, how to detect the error, and the quick go-to solutions for any QuickBooks user to help him work without bugs, glitches, and any kind of technical issues in his system.
We are hopeful that we came to your rescue and tried to be successful enough to assist you in resolving this error. For further help, you can check out our other posts such as Quickbooks update error 15270 and Quickbooks error 179, etc. on our official website.