QuickBooks is an amazing retailing software for small and big businesses. It helps the users to record their transactions and keep all information at their fingertips. The software has the fastest and hassle-free application that makes the users’ life easy. However, just like other software this one also has errors that have caused restriction while using QuickBooks. Users have often experienced the payroll update error, QuickBooks Error PS033.
PS033 QuickBooks error is generally caused when you have a damaged CPS folder. Because of this error, it is difficult for the user to get the updated version of the latest payroll. So if you are dealing with any such issues and not sure how to resolve them, then you are on the right page. In this article, we will discuss the QuickBooks PS033 error more in detail along with the symptoms, causes, and also various ways to solve it. So read the whole article till the end without skipping any step or section.
What do you mean by QuickBooks Error PS033?
Payroll is one of the main features of QuickBooks. It allows the users to direct integration of Payroll which helps them to keep all the records within reach. If you have any issues related to payroll error then, you might receive these error messages:
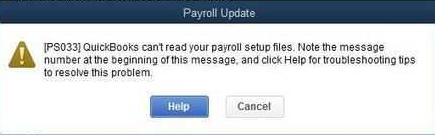
“QuickBooks can’t read your payroll setup files. [Error PS033]”
Now before directly discussing the different solutions, we would first learn about the causes and symptoms of the errors to understand the error in a better way.
What Triggered QuickBooks Error PS033?
There could be many reasons behind the occurrence of the QuickBooks payroll update error PS033. In this section, we have listed down some of them which are more common than others. So here is the list:
- The error might be occurring due to the damaged or corrupted QuickBooks Desktop File.
- You do not have the updated version of QuickBooks.
- Damaged QuickBooks data might also cause the PS033 error to arise.
- You might have entered the incorrect or invalid Employer Identification Number (EIN).
- Incorrect company files PSID is also one of the reasons for the trigger of QuickBooks PS033 error.
- This error may also appear if the QuickBooks Desktop appears as an incorrect EIN or Invalid number.
- It is also possible that the current version of Windows and the version of QuickBooks you are using are not compatible.
- Incorrect service key will also be one of the main reasons that might have triggered QuickBooks error PS033.
Methods to Solve QuickBooks Error PS033
Now since we know the main reasons that have caused the PS033 error QuickBooks, it is time to discuss the solution of the QuickBooks PS033 error. We are certain the methods will help you to resolve the issue you are facing. If you have little or no technical knowledge, do not worry, these solutions are very easy to perform. Hence, without further ado, let us discuss the solutions.
Method 1: Reboot and Fix in Safe Mode
This is the first method of the solution, try this one and check if you succeeded to solve the problem.
- The first step of the method is to Verify and rebuild data in the QuickBooks desktop.
- Now try to download the updated version of the QuickBooks desktop.
To update the latest version of the software to resolve QuickBooks error PS033, follow the steps below:
- Go to the Help option on the QuickBooks software.
- Hit the button Update QuickBooks.
- Now look for the option Update Now and press it.
- Choose the required update version and then click on the option Get Updates.
- After the successful downloading, restart the QuickBooks. You might also get a popup message that asks if the user wants to update the software now or later.
- Tap the option Install Now and then hit the Yes button.
- After following the above step, restart the system as you completed the installation.
- Reboot the software and then update the QuickBooks payroll tax table.
- The final step of the solution is to restart the system.
Method 2: Download the Latest Payroll Tax Table
If the above solution did not help you to resolve the issue then we still have three more ways to fix QuickBooks error PS033.
- First, you need to download the latest version of the payroll tax table.
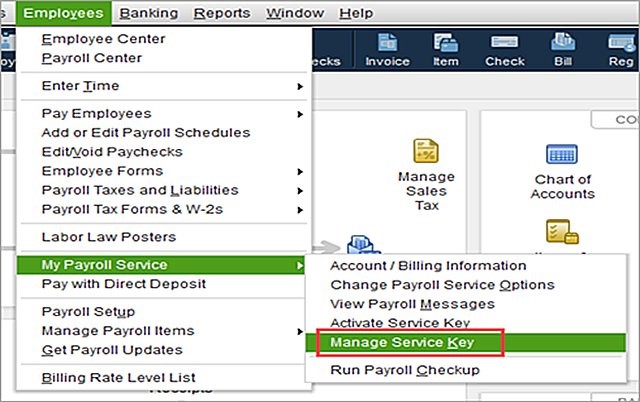
- After successfully downloading, choose the button Employees’ option and then tap on the Get Payroll update.
- The user should choose to download the entire payroll update.
- Now hit on the Update button and follow the instructed steps.
- Check if you are still getting the PS033 error QuickBooks.
Method 3: Rename the CPS folder of QuickBooks
Most of the users are able to solve their issues using the above two solutions. But if it is not the case for you, then hold some patience, this step might turn into a charm for you.
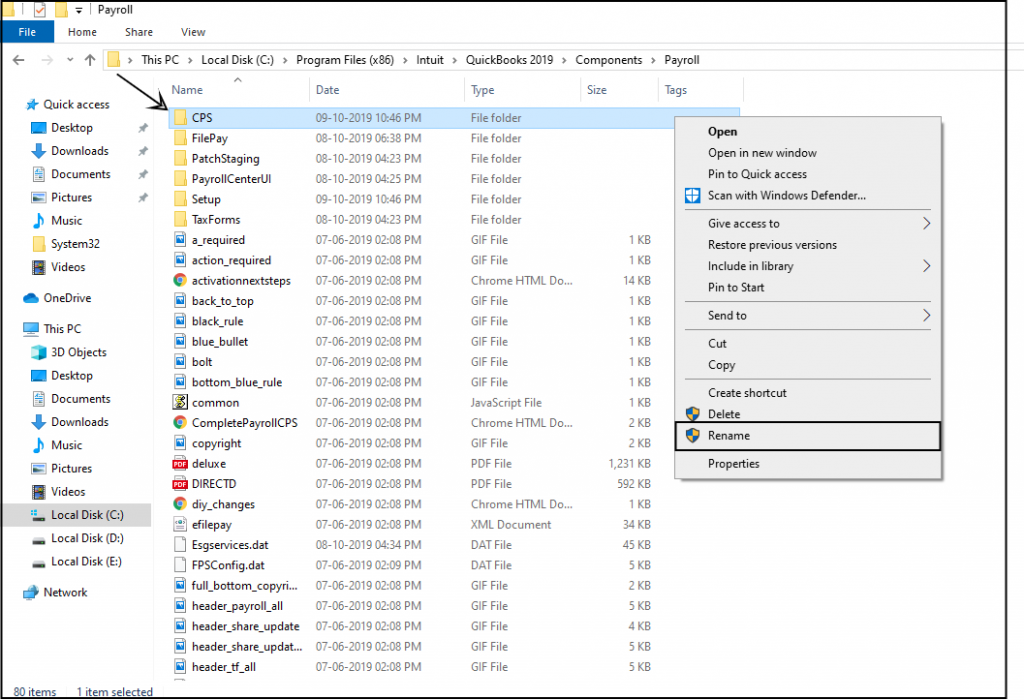
- To rename the CPS folder follow the path: C:\Program Files\Intuit\QuickBooks20nn\Components\Payroll\CPS
- OR, go to the Program Files and then search for the Intuit Folder.
- Click on it.
- After that look for the file QuickBooks, hit the option to open it. Make sure you are choosing the right version of the software.
- Search for the Component button and then choose Payroll.
- Now, click the option of CPS.
- Under the CPS folder, you will get the file CPSOLD.
- Now you can update the QuickBooks payroll tax table.
You Might Also Like, How To Fix Quickbooks Update Error 15270
Method 4: Turning Off User Account Control (UAC)
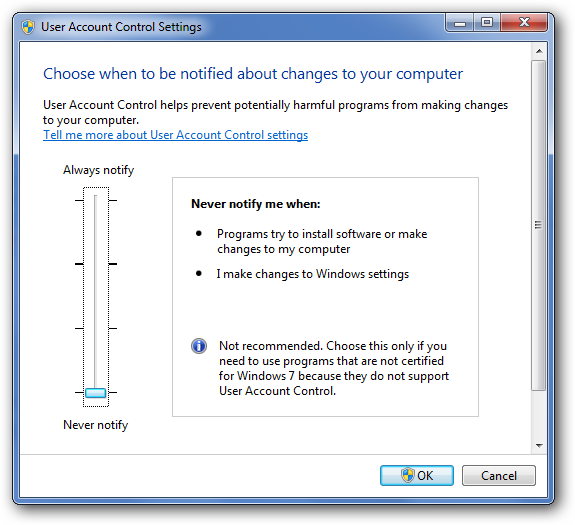
This is the last method of the solution list. So if none of the above solutions worked for you, we are certain this will. In this method, we will try to change the settings of the User account control. In most cases, the changes in the settings help the user to fix the error. So if you are a Windows 7, 8, 8.1, or 10 users, try the steps below to resolve QuickBooks error PS033.
- First of all, to open the Run tab, press the keys of Windows + R together on your keyboard.
- Now on the Run tab type Control Panel and hit the Enter button.
- You can also click on OK to continue.
- Now choose the classic view of the accounts.
- Look for the option to change user account control settings.
- Move the slider and then click the option Never Notify.
Final Words!
We have come to the end of the article. Hopefully, you liked the article and it turned out as helpful material. However if none of the solutions did help you to fix the problem you are facing, then we recommend you to contact the helpline number of the software. You can easily get in touch with the support team from the official website of Intuit QuickBooks. Share the article within your circle. Stay connected!