
QuickBooks, created by Intuit, is software that assists companies and firms in supervision, management, and administration of their tax reports, financial data, and other valuable information. It is the universal solution to bring together different companies and businesses that helps in the progress and expansion of an industry. With its modern programming features, it is winning the hearts of the users and is on its way to becoming one of the best accounting software at present.
Though it seems to be at its peak of development, yet it has many negatives that cannot be overlooked. Imagine you are working hassle-free in free flow but suddenly error messages start popping up, you will be interrupted a lot so is the same case with QuickBooks. Many users face different kinds of errors like install error, update error, firewall error, etc. in Quickbooks. Today, we will be focusing on install errors. To start with, let’s know about it briefly. The install errors can be seen when you start installing the QBs software. This issue was noticed quite early and they created another astonishing toll ‘QuickBooks Install Diagnostic Tool’ to troubleshoot any such kind of installation bugs.
QuickBooks has become a secured application software after further developments by the tech team of QBs. In need of information about all the concepts of the QuickBooks Install Desktop Diagnostic Tool, then buckle up your seatbelts, we are up for a ride.
Defining QuickBooks Install Diagnostic Tool
The Quickbooks Install Repair tool is a tool that is formed for resolving and fixing the basic install errors that you can encounter in QuickBooks. It detects and troubleshoots these problems via .NET Framework, C++ and MSXML. These components are unable to function properly or freezes and the screen shows the QBs errors. QBs diagnostic tool exe file downloaded and properly installed help in resolving all your errors experienced during the process of installation of this management software.
System Specifications For QuickBooks Diagnostic Tool Install
Installing a QBs diagnostic tool needs the least of specifications as you have to operate your PC in its latest upgraded version and make sure it is a Windows operating system. Also, you need to have two different variants of software that have been mentioned below.
- Microsoft .NET Framework
- Microsoft Visual C++ Redistributable package
Issues and Errors in QB Diagnostic Install Tool
There are a few errors and issues that you can encounter in QB and we have provided a list below to help you detect such problems.
QB Installation Issues Faced
- Impaired and Damaged structure of the MSXML component.
- Windows halts and freezes.
- C++ programming errors displayed.
- Framework error i.e .Net Framework Error appears.
- The mouse and keyboard do not respond to its functions properly.
Installation Errors
- Error Code 15210
- QB Error 1935
- QuickBooks Error 1603
- QBs update error 1328
- QuickBooks update Error 12007
- QB Error code 1722
- QB Error code 1723
Downloading and Installing QuickBooks Diagnostic Tool
QBs Install Diagnostic Tool download and install is similar to all the other software and a step-by-step guide is given below to help you in this process. You just need to follow the steps given below.
- From the official Intuit QBs website, you can easily download QuickBooks Install Tool.
- Choose a directory to save your downloaded tool exe file.
- Now, you will see the ‘QBInstall_tool_v2.exe’ in your saved directory.
- Also, you need to close all the running QBs applications in the background.
- Double-clicking on ‘QBInstall_tool_v2.exe file’ will run the .exe file.
- After this, do as per the on-screen instructions and the license agreement for the terms and conditions should be accepted.
- Restart the computer system for completing the process of installation.
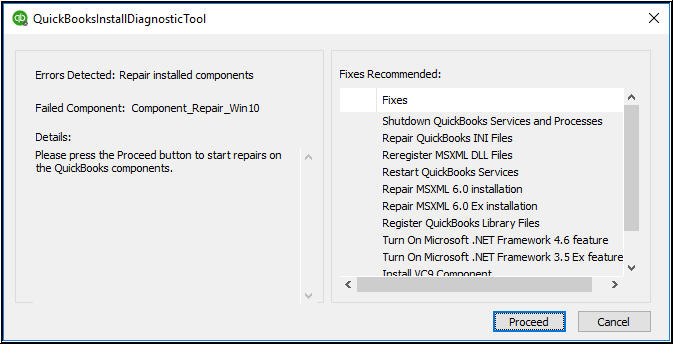
Fix Errors via QuickBooks Install Diagnostics Tool
With the tool stored in your system and you are ready to use it. This article will now focus on how to use the install diagnostic tool for resolving errors arising in the installation process. Read the below to get the solutions.
Diagnose Connection Tab
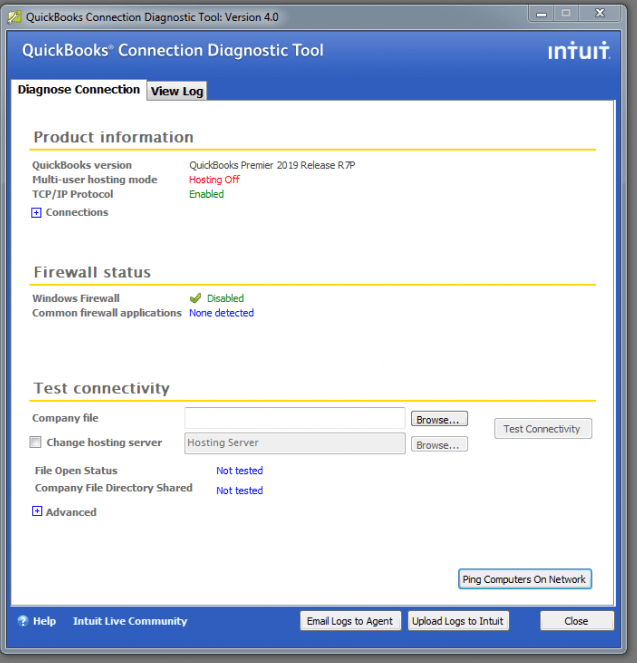
The primary use of this tab is to fix the network and connection errors that can prevail due to the unclean installation process. Unclean installation can lead to errors such as quickbooks update error 15243. The accessibility of the company file can be set up in a single user or multi-user mode. By this diagnose connection tab, you will be able to troubleshoot all the network connectivity errors instantly in a few clicks.
Firewall Status Tab
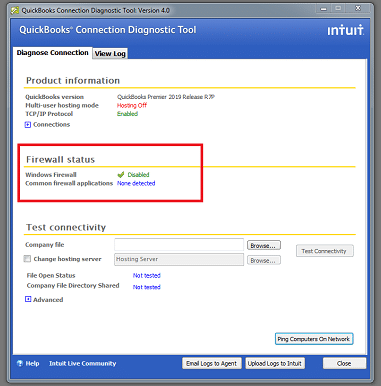
The firewall status tab is the basis for rectifying all the firewall errors and provides the medium through which all the settings of the firewall can be set as per the preference of the user.
Test your Connectivity Tab
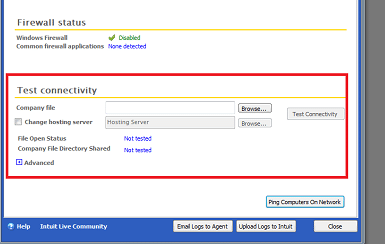
The last tab ‘Test your Connectivity’ assists the user in integrating the areas of network and connectivity among all the hosts and connected server stations.
How can you test your Connectivity?
The step-by-step procedure for testing your connectivity is given below.
- Besides the Company file main field, Click on the ‘Test your Connectivity’ tab.
- A good network configuration setup of the Linux system is required. To proceed further, select and change the settings of the hosting server check dialog box.
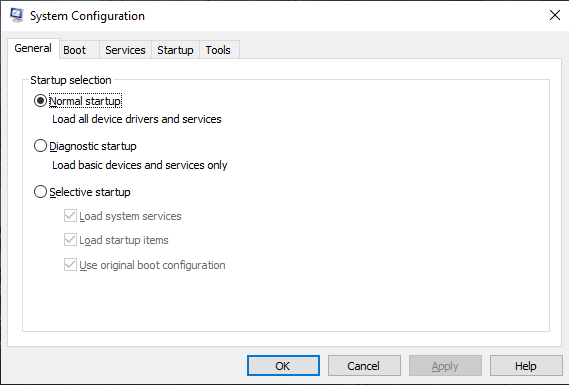
Selective Start-Up Mode
Installing the QuickBooks Desktop Tool can also show some glitches and bugs many times due to the existence of different anti-virus and spyware programs. To fix this error, you should access the process of installation in selective start-up mode. The steps below will guide you towards using this mode easily.
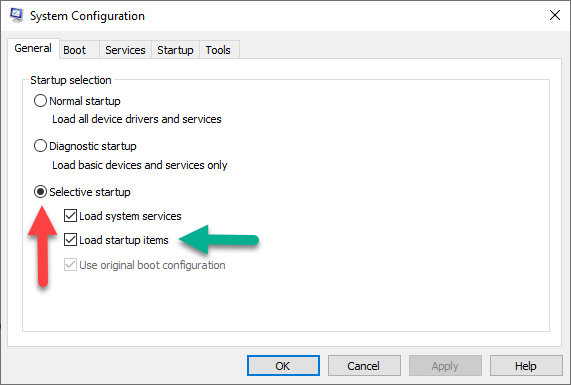
- Firstly, operate your system in the selective start-up mode.
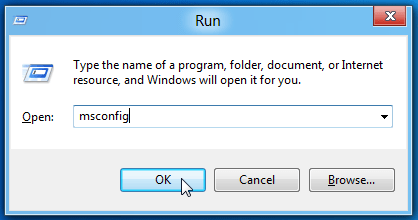
- Press Windows + R to access the Run window.
- Type in ‘msconfig’ in that window and tap on OK.
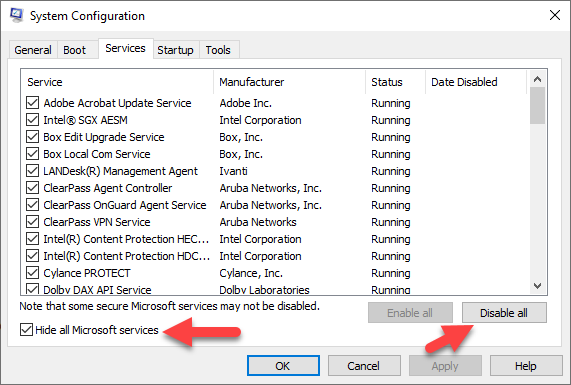
- Within the Tab General, tap on ‘Hide all Microsoft Services’
- Now go for the ‘disable all’ tab.
- The ‘Hide Microsoft services’ checkbox should be unmarked.
- Now, select to mark the list of services and hit on the checkbox ‘Windows Installer’.
- Press OK.
- Reach out for the system configuration settings and ‘Restart’ your computer system.
- After this, go to the ‘Normal Configuration’ setup for restoring the default configuration setup.
- Again, open the run window as done above.
- Now type in ‘msconfig’ again and tap on OK.
- In the General tab, go for ‘Normal start-up’ and hit OK.
- Reach out for the system configuration setup and ‘Restart’ your PC.
Windows Update
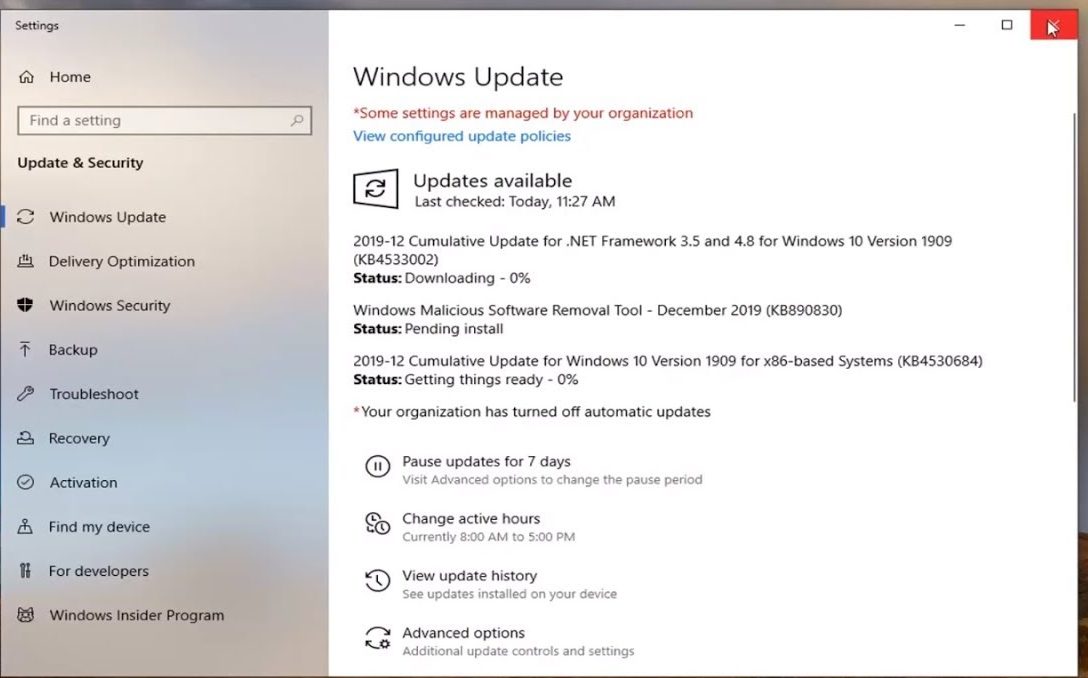
The Windows in your system must be updated in order to self-resolve any kind of error that can arise during your work operations. We have given the steps below to assist you.
- Firstly, you need to install the upgraded latest version of the Windows operating system.
- Restart your PC now.
- If there is an error coming up on your screen while operating QuickBooks then you have to open the company file first and continue with the work.
- In case the problem still prevails in your system, try for the process of clean installation of QuickBooks again.
Manually Fixing Components of Windows
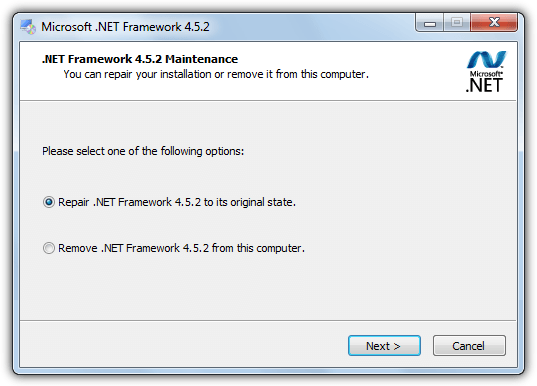
You can still have many errors existing in your system that can be resolved, then you have to repair Windows manually. You need to understand that it is a bit difficult process, so you should take assistance from an IT professional to repair and reinstall Microsoft .Net Framework and other components.
- You need to perform the Windows update after installing it & the .NET framework, MSXML & C++ missing updates will be self-resolved.
- In case these components have been out of date, QuickBooks will not have a clean installation of them. Moreover, you should update your operating system Windows and its components to the latest version.
Points to Remember
While opening the Install Diagnostic tool. A user should take care of the following points.
- After the tool is successfully stored on your PC, you should close the running applications in the system and then run a scan by clicking on it.
- You can reboot your system in case of errors being still present in your software.
- A few times you can see a message “No Errors were Detected” via the install tool diagnostic scan but do not consider this as the true statement because there still can be many errors undetected prevailing in the system. It is called the failure of the tool to detect any such hidden errors.
Wrapping-Up
The Quickbooks Install Diagnostic tool is created for troubleshooting and fixing the general install errors that you can encounter in QuickBooks. It detects and resolves these issues through the .NET Framework structure, C++ and MSXML. It fixes installation errors like Error Code 15210, QB Error 1935, QuickBooks Error 1603, QBs update error 1328, etc. and issues related to the Microsoft components. We have explained every aspect associated with this tool in the easiest way possible but in case you are not able to grab this valuable information to resolve the bugs and technical glitches during installation, you can coordinate with the tech team of Intuit QuickBooks. Moreover, you are advised to take proper guidance from the professionals with expertise in the related field.